
How To Fix A Broken Phone Charger Fast and Make It Last

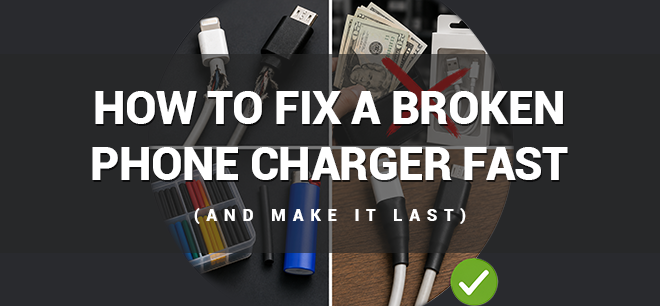
Your phone's on 3%, your charging cable only works at a 37° angle, and you're ready to scream. Sound familiar?
You know that spot on every phone charger that craps out first — the little bend right where the cable meets the plug?
That's what this blog is about.
You don't need to buy another phone charger. You just need to wrap the one you have with heat shrink tubing before the wires poke through.
And we're going to show you exactly how.
Why Your Charger Always Breaks in the SAME Spot
You know what spot we mean.
Whether you use an Apple iPhone charger or an Android phone charging cable, it doesn't matter. They all break in the exact same spot.
Welcome to the club. Nobody is happy to have a broken phone charger, but we can show you how to fix the broken charger you already have. So you never have to buy a replacement phone charger–ever again.
Here's What You Need To Know: Phone chargers break at that point because it's where the flexible part of the cable transitions into the rigid connector housing. It's also the thinnest part of your phone charger.
Inside that transition point are tiny copper conductors. They're the electrical pathway. They need straight lines and secure connections, or they don't work, and neither does your charger. When this spot on your phone charger breaks, it stresses out the charging port on your phone. So if you're wondering, "Why is the charging port on my phone broken?" This spot is usually the culprit.
But what our phone chargers tend to get is: bending, plugging, pulling, twisting, pockets, backpacks, purses, car floors, the ground (whoops), the bedside table, under the bedside table. And then we hoist them up by the charger cord, bend it some more, and use it while it charges at a right angle.
That's a lot of movement. In a very small space, that's already weak, thin, and vulnerable. Eventually, the copper strands fatigue. The flex in your cable goes away. Microcracks form, and all the problems start.
If your phone charger only works at an angle, this is why. That tiny transition point is always on the verge of failure. If your iPhone charger is acting up, check this spot. If your Android charger isn't working, check this spot. If your phone charging port is broken, you guessed it. Check that spot.
The weakest point in every phone charger is between the device plug-in connection point and the cable itself.
Meet Heat Shrink: The Hero Fix for Every Charging Cord
Here's the part nobody ever tells you: heat shrink tubing fixes that spot on every phone cord.
Don't stop reading. Heat shrink tubing is easy. They're just small rubber "tubes" made out of polyolefin.
This special material is flexible, durable, and naturally resistant to wear. It's used for wire protection. The U.S. military and NASA put it in their vehicles and missions. Food services, medical, research, construction, IT, and industries all over the world use heat shrink tubing. And you can, too.
Heat Shrink Tubing Is:
- Cheap — Costs less than replacing a single phone charger and lasts longer than the cable itself. It's the simplest, most affordable way to stop the cycle of buying new cords every few months.
- Fast — Takes seconds to apply. No waiting, no curing, no drying — just instant reinforcement, literally at your fingertips.
- Durable — Polyolefin is built to withstand bending, friction, pressure, and daily abuse. It protects the exact weak point your charger can't protect on its own.
- Convenient — Small, lightweight, and easy to store. Keep a few pieces in a drawer, bag, or toolbox and fix any cable the moment it starts acting weird.
- Colorful — Comes in dozens of colors so you can match your cable, organize your cords, or just make your charger look less sad.
- Customizable — Available with custom printing so you can add text, logos, names, numbers, or identifiers directly onto the tubing. Perfect for labeling cables, branding equipment, or marking cords so you always know which one is yours.
- No tools or skills required — You don't need a workshop, a toolbox, or experience. If you can hold a cable, you can reinforce it. And you can do it with just a lighter!
Heat shrink tubing is THE magical fix for broken phone cords and bad charging cables.
All you need is one piece of heat shrink tubing to repair (or reinforce) every cord, every time.
Step-by-Step Guide To Fixing Broken Phone Chargers:
You have to get the heat shrink in your hands before you can fix your broken phone charger. That means you have to "pick out" the right kind of heat shrink tubing.
Since heat shrink tubing is so versatile, it comes in different sizes (the diameter of the tube itself) and shrink ratios (original size : shrunk size). Don't let the numbers scare you.
Here's what you need to know: If you're trying to fix a broken phone charging cable, this is the heat shrink to get:
For iPhone chargers (Lightning + USB‑C iPhone charging cables):
- Get: 2:1 Polyolefin Heat Shrink Tubing
- In: 3/8" diameter
- Works on Apple Lightning, Apple USB-C, and most braided iPhone charger cables, including iPad and Apple Watch.
- Pre-2018 Apple connector? Grab the larger 3:1 shrink ratio.
For Android chargers (USB‑C charging cables + Micro‑USB):
- Get: 2:1 Polyolefin Heat Shrink Tubing
- In: 1/4" diameter
- Works on Samsung, Verizon, Google Pixel, Motorola, all Android devices, and older Micro-USB Type A and Type C cables.
Once you've got the right heat shrink in your hands, the hard part is over. Still not sure which size you need? Just ask us. We'll match you to the right product and send you a free sample to try out.
Step 1: Set Up
The first step is to gather your materials. The heat shrink you chose does the hard work. You just need scissors to cut it and a heat source to activate it. Just grab a small lighter or butane torch; it's actually all you'll need for heat!
Make sure you cut the tubing piece a little longer than the spot itself. You'll get about 15-20% shrinkage horizontally; it's not much, but it's better to work with a slightly longer piece than you think. For most broken phone chargers, 3-4 inches of heat shrink tubing is long enough.
If you're not the best at measuring or cutting, just grab an assortment kit. The pieces come precut, premeasured, and in a variety of diameters. So the right piece is always right there. The kit easily throws back in your junk drawer, glove box, toolbox, or wherever you need it next. Just grab and go.
Step 2: Slide It
The next step is simple.
Just take your 4-ish-inch heat shrink tube, and your unplugged phone charger, and slide the tube over the cord until it's resting over the bend where the cable itself turns into the device plug-in. You know the spot we mean. Make sure the tubing isn't extended over the metal connector, though. The metal end still has to plug into your device.
And here's the best part: you can do this to any phone charger you have — broken or not. If your phone charger is already broken, your one little piece of heat shrink will repair the damage and prevent it from spreading.
If your phone charger isn't broken yet, at all, do this anyway. Because when you reinforce "that spot" before it breaks, the heat shrink tubing absorbs all the hits, bends, and movement you throw at it.
- Heat shrink protects electrical integrity
- Keeps you safe
- Keeps your charger working for years
- And it stops the cheap, standard insulation that every phone charger is made from from getting brittle, cracked, or roughed up.
- Wrap "that spot" in heat shrink, and you'll have a phone charger that will never break.
You don't have to tape it down or hold it still. Just slide it over your cord and cover the weak point where your phone charger always breaks. Then you're ready for heat.
Step 3: Shrink It
If you can toast a marshmallow, you can do this. (See it done here.)
Grab your lighter in one hand. Grab your unplugged phone charger a few inches back from your tubing with the other hand. This gives you control but distance from the heat.
Hold the lighter about four inches under the piece of tubing, and light it up. Keep the flame moving. Don't park it in one spot — rotate your phone charger so the heat hits the tube gently from all sides. And always from 4 inches away. Think of it like turning that golden brown marshmallow over a campfire: slow, steady, and never stuck burning in one place.
It only takes a few seconds. You'll see the tubing start to react almost right away. It tightens, hugs the cord, and shrinks down smooth. That's your cue you're nearly done. Let off on the heat a little bit and check your progress.
You'll know you're done when the tubing is flush to the charger, smooth, and flat all the way around.
That's it. No heat gun, no fancy tools, no stress. Just a lighter, a little patience, and a phone charger that's now reinforced for the long haul.
Quick Tips For The Best Results
Broken phone chargers don't fail because we're rough on them. They fail because we're rough on them and they're not reinforced at their weakest spot.
This section is full of helpful tips, hints, and behind-the-scenes advice so that you can avoid mistakes, get cleaner shrinks, and have all the resources you need to fix your broken phone charger for good.
Here's what nobody tells you:
- If your tubing barely fits, it'll split when heated. Go one size up in diameter for a cleaner shrink. (A smart nudge for Step 1.)
- Working with a wider end, thicker plug, or older cable? Scoot up a shrink ratio size. 3:1 Polyolefin heat shrink tubing starts larger and shrinks smaller perfectly. (A helpful hint for those wondering…do I have the right size?)
- If you think there's too much pre-shrink "play" in your tubing, go down a diameter. Most phone charging cords are small enough to fit 5/16" or ¼", too.
- Flames must stay 4 inches away! (A Step 3 heads-up.)
- Swap the lighter for a heat gun, and you'll get perfect, even shrinks every time. (If you want to get tools involved in Step 3, watch this video. Totally optional.)
- Upgrade to adhesive lined heat shrink tubing, and you'll have a waterproof connection, too. (A simple durability swap.)
- You can use electrical tape for temporary "that spot" repairs and safety on the fly. But this is only a temporary fix. It's not as secure as tubing, and it won't last long. Sticky fades, but tubing stays.
- Buy this: Heat Shrink Kit if you want to skip all the measuring, cutting, and guesswork.
- Ask here: Request a Free Sample if you need extra help picking the right products.
All of this leads to one simple truth about broken phone chargers — and it's the part most people never change: reinforcement is the difference between a charging cable that breaks and a charging cable that works.
Stop Replacing. Start Reinforcing.
Three steps. One lighter. One piece of tubing. That's all it takes.
Sounds too good to be true.
No more broken phone chargers. No more buying new phone chargers. No more wasted time, money, and trips to the store. Stop replacing your broken phone chargers! Just grab some heat shrink, slide it on, and shrink it down over that spot.
You know the spot we mean. The spot on your phone charger that's now reinforced with heat shrink tubing. Yeah, it's not going to break anymore.
All it takes is one piece of heat shrink, and your phone chargers will never break again.
Stop the cycle of replacing. Start reinforcing today.
Visit BuyHeatShrink.com and grab the heat shrink you need to fix your broken phone chargers fast and make them last. It really is that easy.


About the Author

Types of Heat Shrink: What They Are, and What They’re For
September 9, 2020
How To Remove A Cable Tie
August 10, 2020

10 Types of Electrical Connections and How They’re Made
March 10, 2021

The Top 10 Do's and Don'ts of Heat Shrink
November 10, 2023

How to Use Heat Shrink Wire Connectors
November 5, 2023

The Complete Hunter’s Guide to Better Outdoor Gear
September 30, 2026
How to Measure Cable Diameter
September 29, 2026

Road-Worthy: How Sleeving Helps Long-Haul Trucking & 18-Wheelers Get It Done
September 10, 2026
How To Waterproof Home Swimming Pool Wiring
August 13, 2026