Make Your Own Heat Shrink Y-Transition

HOW TO MAKE A Y-TRANSITION WITH HEAT SHRINK TUBING
Making your own Y Transition cable breakout is an easy and cost-effective wire routing solution that can be accomplished using heat shrink tubing and a few common materials. Follow this simple tutorial below to save money with this simple wiring solution.
HOW TO USE A HEAT SHRINK Y-TRANSITION?
Here is a common example of a wiring scenario where you would need to make a quick Y-Transition: Imagine you have an audio cable and a CAT-5 (a CAT-5 is a twisted pair cable for computer networks) running through the same channel and you need to split them off to create separation between the channels because the audio channel is sensitive to the CAT-5 noise. Instead of buying an expensive Y-transition, we'll make one!
STEP 1
Select the appropriate size of polyolefin heat shrink for, while keeping in mind that you want a snug fit on the wire after shrinking. In this example, we are using ½ inch heat shrink tube with a 2:1 shrink ratio. Note: the plug on the head of the wire would not fit through any smaller tubing.

STEP 2
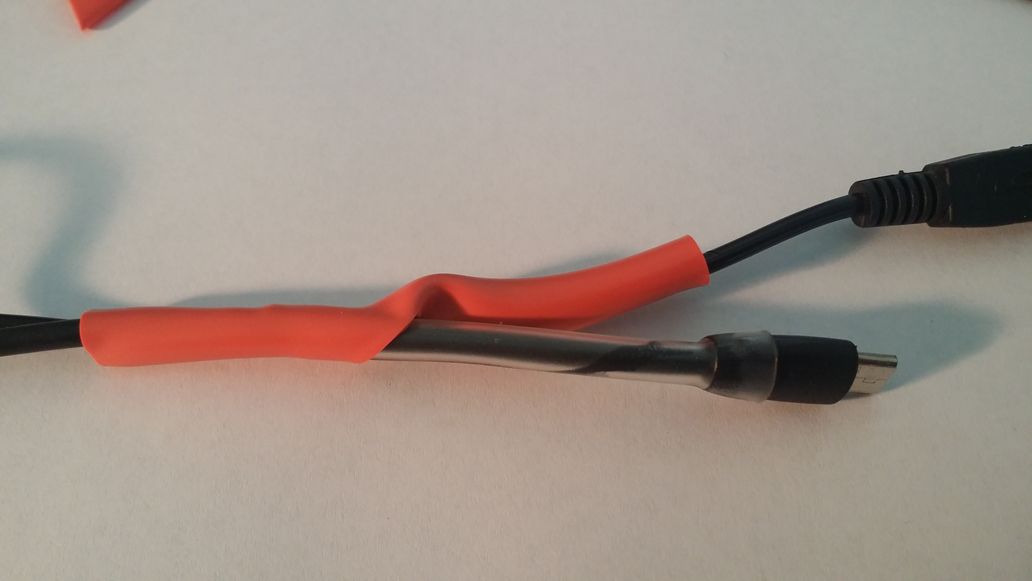
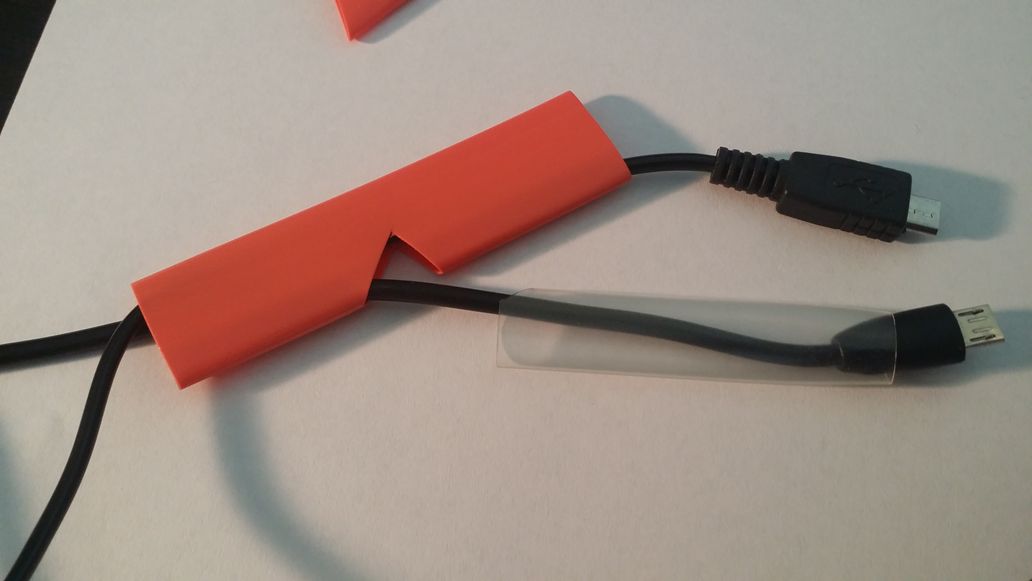
Cut a V-shaped hole in the Red 2:1 Tube so the other cable can be threaded through. Immediately cover this wire with appropriate sized tubing and shrink, as seen in Picture #3
STEP 3
Pull the slack end of the wire back so that the new layer of heat shrink is sitting inside the Red Tube. Now, apply heat to the Red Tubing and Shrink.
STEP 4
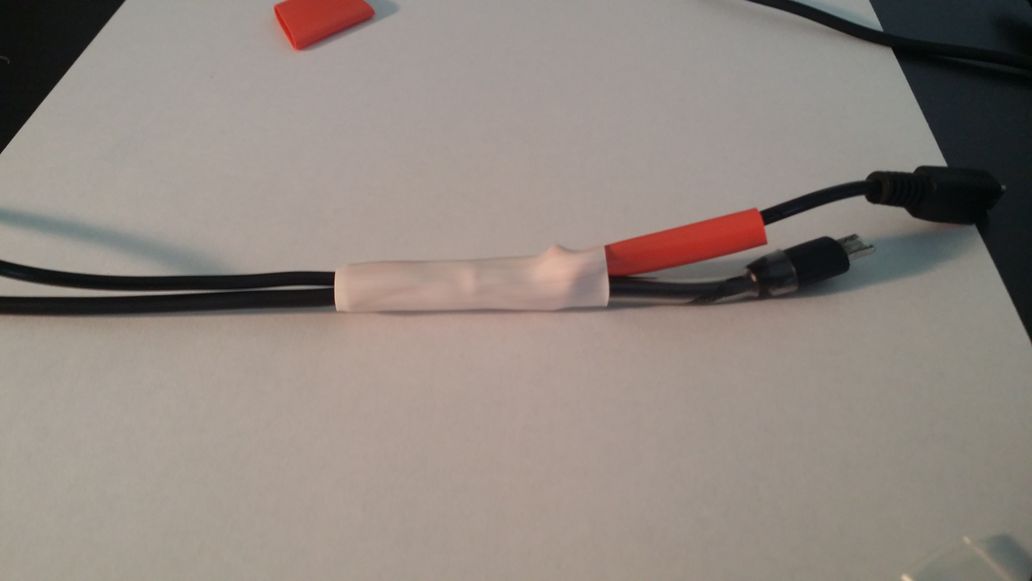
For a cleaner finish, use another piece of heat shrink to cover the split, as seen below. This step is not necessary, but increases insulation and will keep your work looking tidy for years to come.


About the Author


Types of Heat Shrink: What They Are, and What They’re For
September 9, 2020

How To Remove A Cable Tie
August 10, 2020

10 Types of Electrical Connections and How They’re Made
March 10, 2021

The Top 10 Do's and Don'ts of Heat Shrink
November 10, 2023

Heat Shrink Sizing Guide
September 29, 2020

How Heat Shrink and Mil-Spec Keep Systems Airworthy
July 2, 2026

A Man & His Garage: How to Get it Under Control
June 25, 2026

The Only 5 Products You’ll Need All Summer
June 11, 2026

How To Protect HVAC Wiring From Summer Strain
June 4, 2026