Diameter
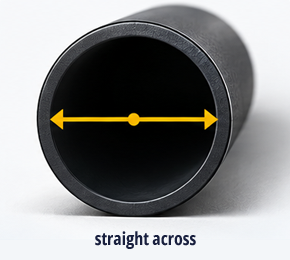
The distance straight across the cable, passing through the middle. This is the number nearly everything on our site is based on.

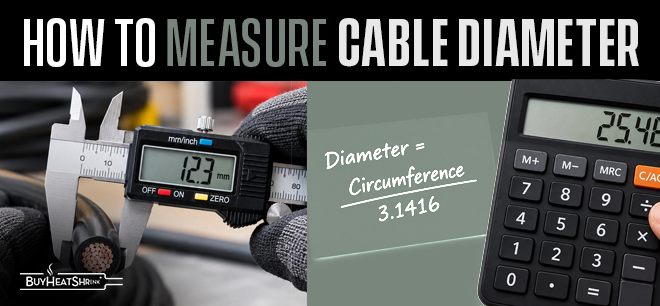
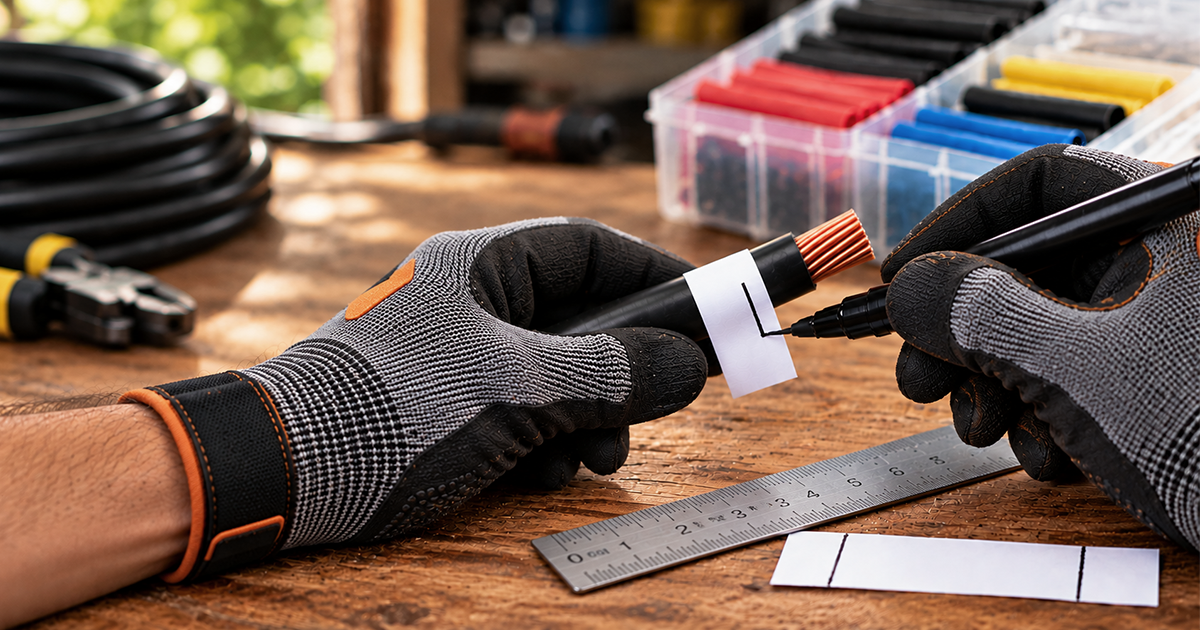
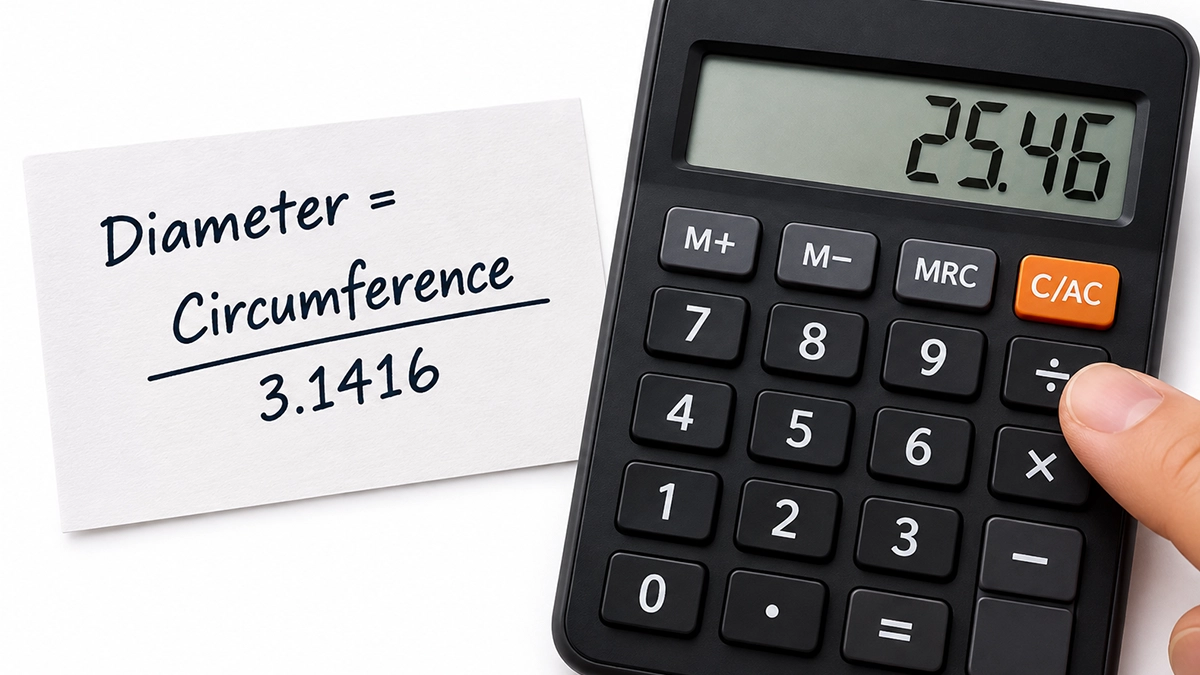
To measure cable diameter, wrap a strip of paper once around the cable, mark where it overlaps, lay it flat against a ruler, and divide that length by 3.1416. The result is the outside diameter. If you have calipers, measure straight across the cable over the jacket instead.
Diameter = Circumference ÷ 3.1416
Measure around the cable, then divide. That gives you the distance straight across.
These four describe the same round cable in different ways. Ordering the wrong one is the single most common and most expensive mistake, so it is worth two minutes now.
The distance straight across the cable, passing through the middle. This is the number nearly everything on our site is based on.
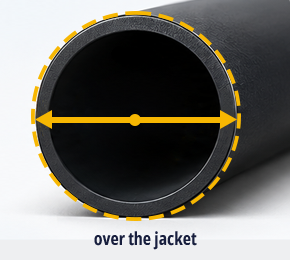
The diameter measured over everything, including the insulation, not just the copper inside. This is what you want. When we say "cable diameter", we mean OD.
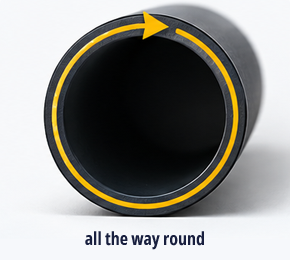
The distance all the way around the outside. About 3.14 times the diameter. It is what you measure with the paper-strip method below.
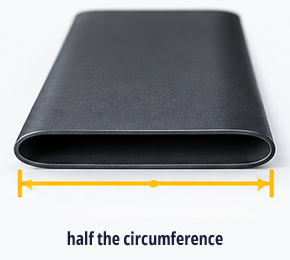
Only applies to tubing, not cable. It is the width of a tube when you squash it flat, which is about 1.57 times its diameter, always bigger. Never order tubing by flat width when you mean diameter.
If any of this vocabulary is still doing you no favours, the heat shrink terminology guide defines the rest of the words you will meet on a product page.
The quick sanity check: circumference is roughly three times the diameter, and flat width is roughly one and a half times the diameter. If a number is about three times bigger than you expected, you have measured around the cable instead of across it.
This is the method to use if you do not own calipers, which is most people. It measures the circumference and works backwards to the diameter.
Take a strip of paper about half an inch wide, or a piece of thin string, and wrap it once around the cable. Keep it snug against the jacket but do not pull it tight enough to squash the cable.
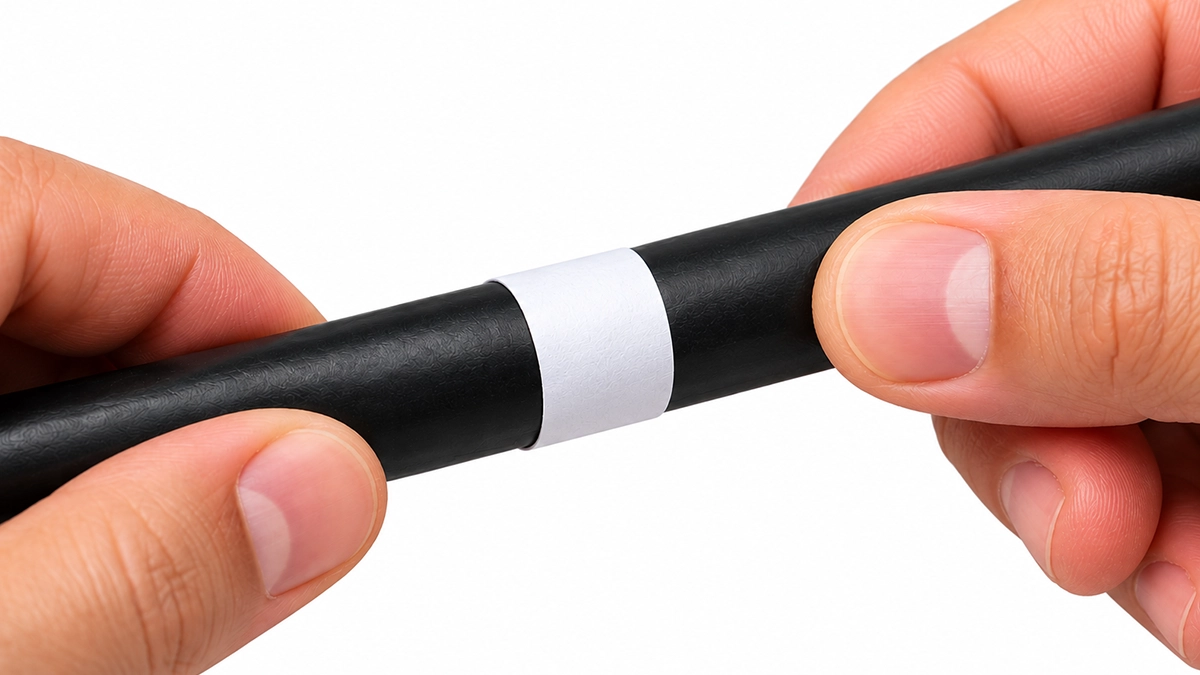
Let the end of the strip overlap the part already wrapped around the cable. Mark the exact point where the end lines up with the strip underneath it.
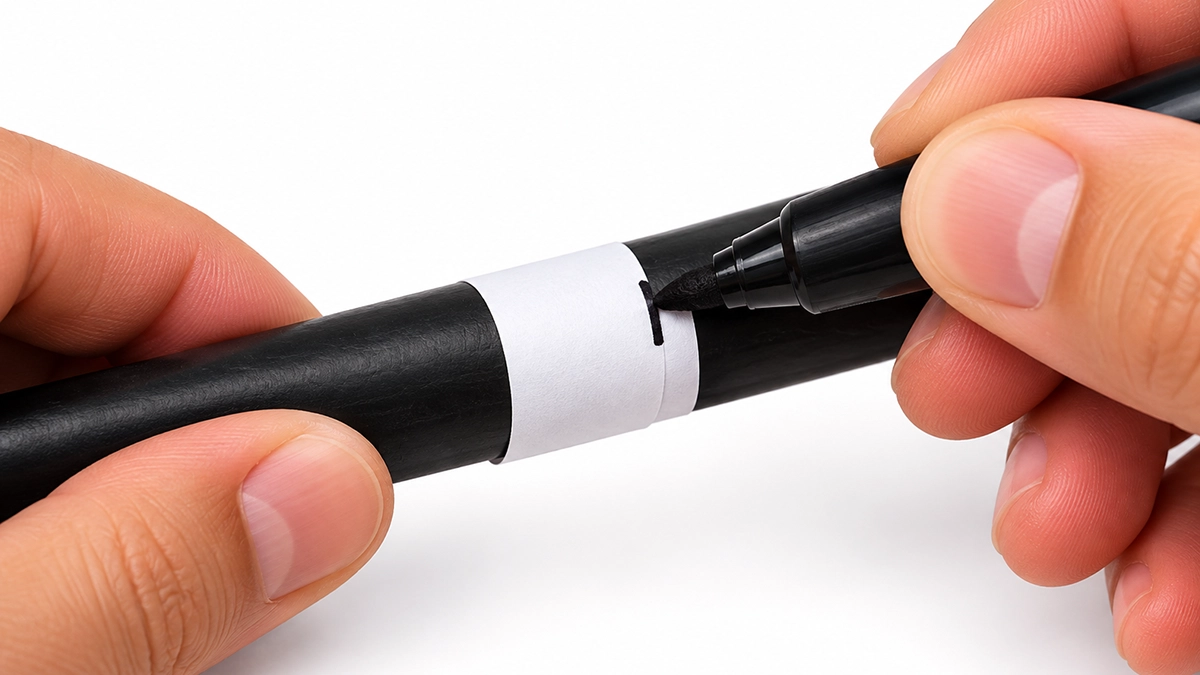
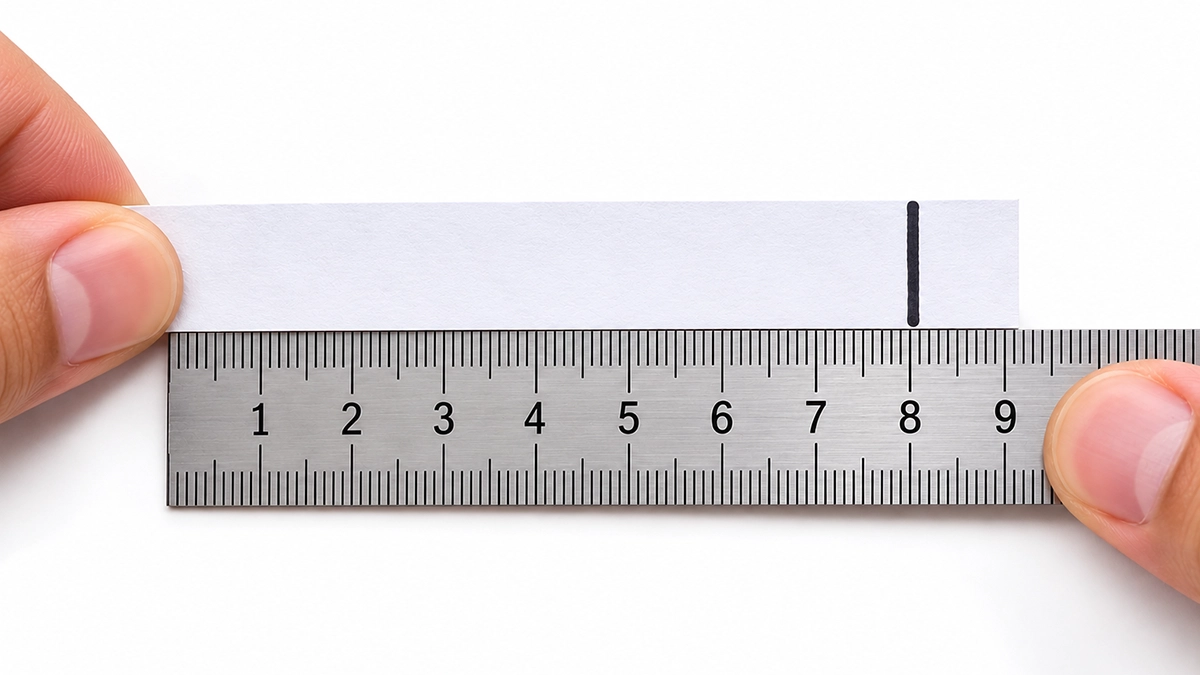
Unwrap the strip and lay it flat. Measure from the end of the strip to the mark you made. That distance is the circumference of the cable, which is the distance all the way around it.
Divide the circumference by 3.1416 to get the diameter. The calculator on this page does the arithmetic for you and shows the working.
Hold the calculated diameter against the cable using a ruler as a sanity check. If the number looks obviously wrong, the strip probably slipped or was pulled too tight, so measure again.
Enter the length of the strip you just measured. This gives you the cable's outside diameter.
How accurate is this? On a normal cable, expect to be within about half a millimeter, which is good enough to choose a tubing size in most cases. The strip has thickness, paper slips, and a soft jacket squashes slightly, and all of that adds up.
Below about 1/8 inch (3 mm), the error becomes a large share of the measurement and this method stops being reliable. For anything that small, use calipers or ask us.
| Measured around the cable | Same, in inches | Diameter | Diameter, in inches |
|---|---|---|---|
| 10 mm | 0.39 in | 3.18 mm | 0.125 in |
| 15 mm | 0.59 in | 4.77 mm | 0.188 in |
| 20 mm | 0.79 in | 6.37 mm | 0.251 in |
| 25 mm | 0.98 in | 7.96 mm | 0.313 in |
| 30 mm | 1.18 in | 9.55 mm | 0.376 in |
| 35 mm | 1.38 in | 11.14 mm | 0.439 in |
| 40 mm | 1.57 in | 12.73 mm | 0.501 in |
| 50 mm | 1.97 in | 15.92 mm | 0.627 in |
| 60 mm | 2.36 in | 19.10 mm | 0.752 in |
| 75 mm | 2.95 in | 23.87 mm | 0.940 in |
| 100 mm | 3.94 in | 31.83 mm | 1.253 in |
Every row is the measured distance around the cable divided by 3.1416. For a value that is not listed, use the calculator above.
If you size cable more than occasionally, a set of digital calipers pays for itself the first time it stops a wrong order. They are widely available from hardware shops and online for roughly $15 to $25, and any basic set is accurate enough for this.
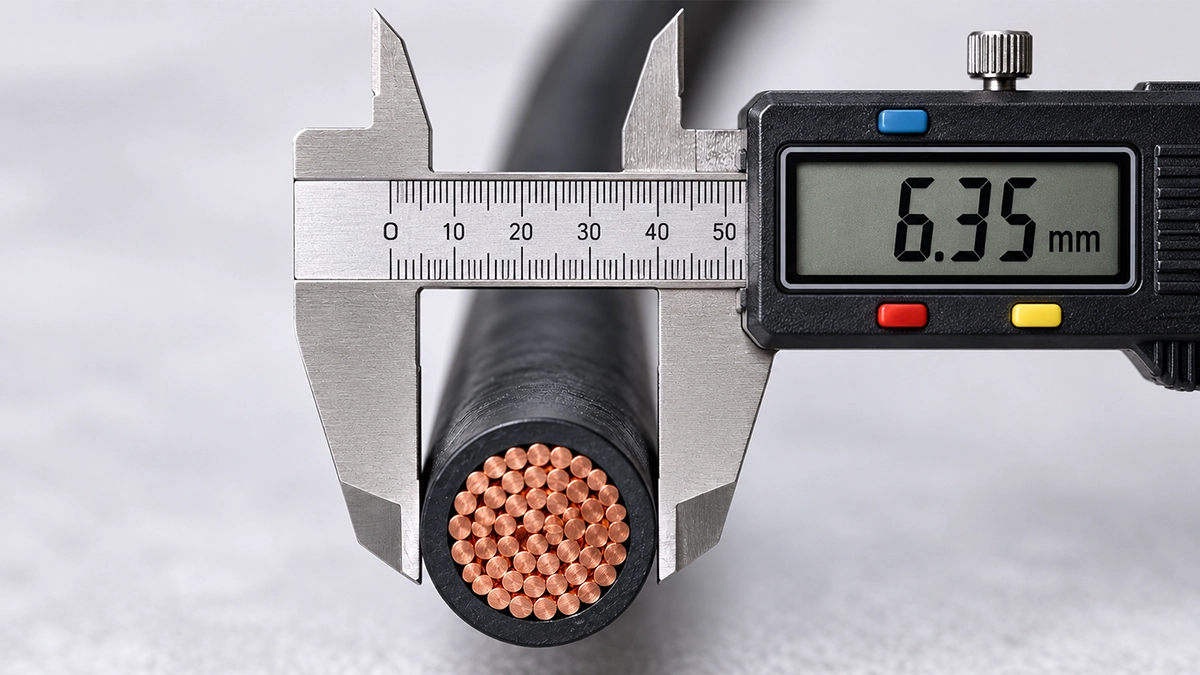
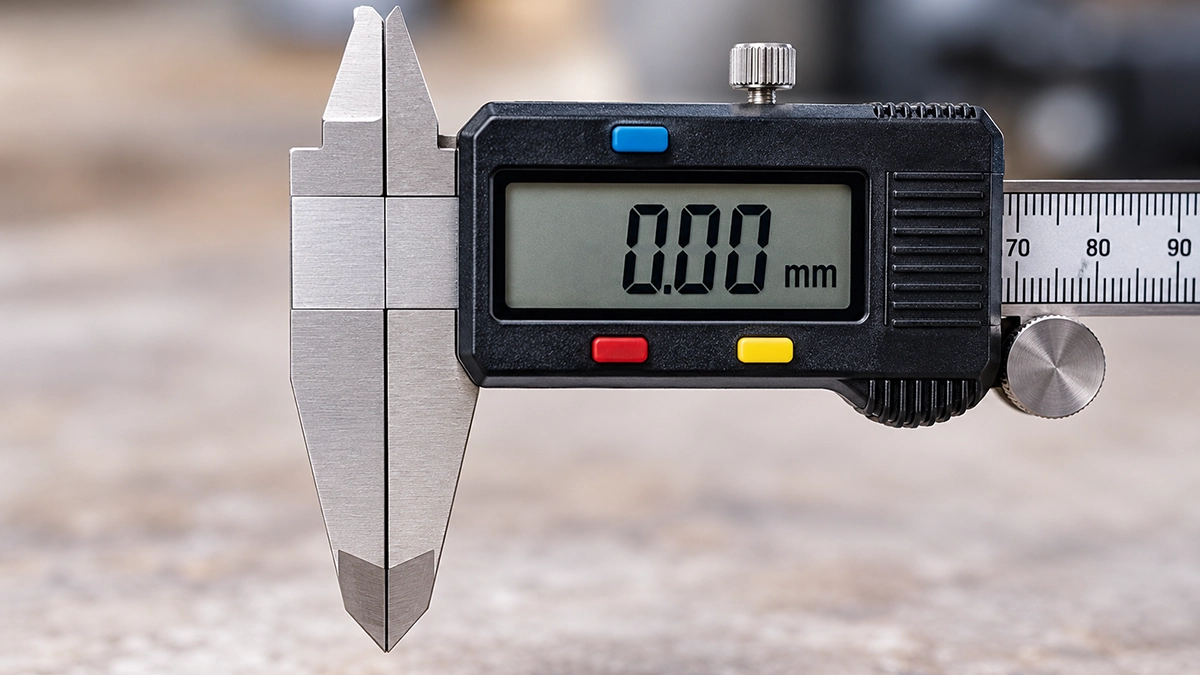
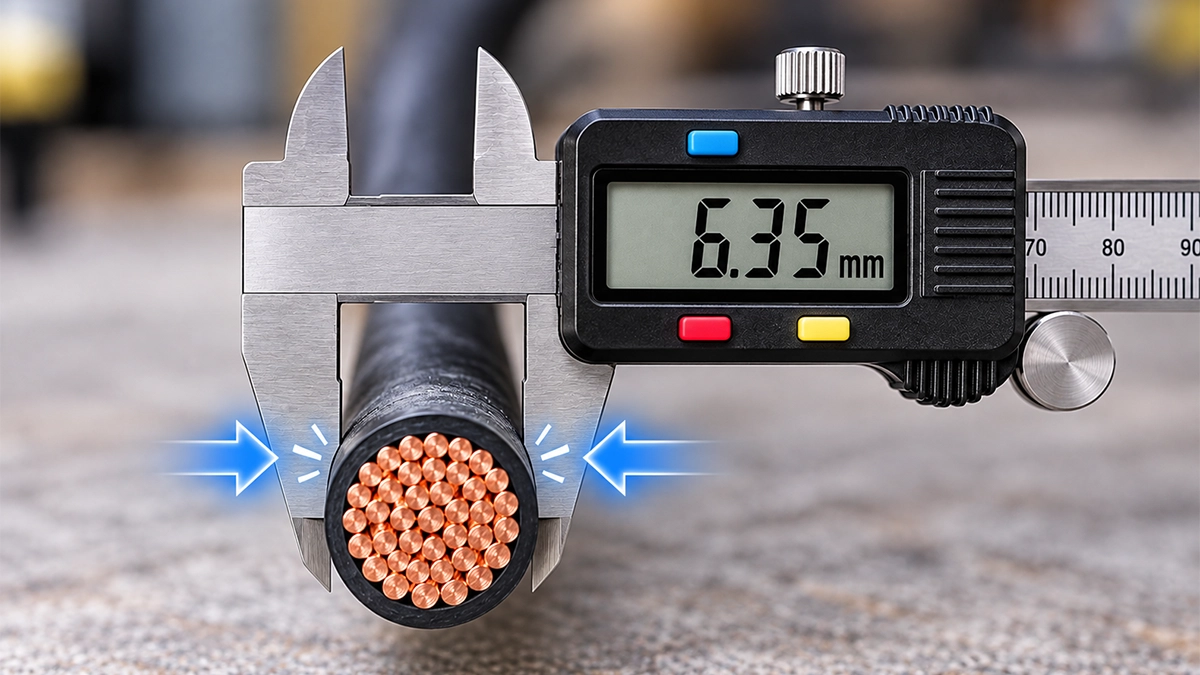
Close the jaws fully and press the zero button. If the display does not read zero when closed, every measurement afterwards is off by that amount.
Measure with the wide flat faces, not the pointed tips. The tips are for inside measurements and will dig into the jacket.
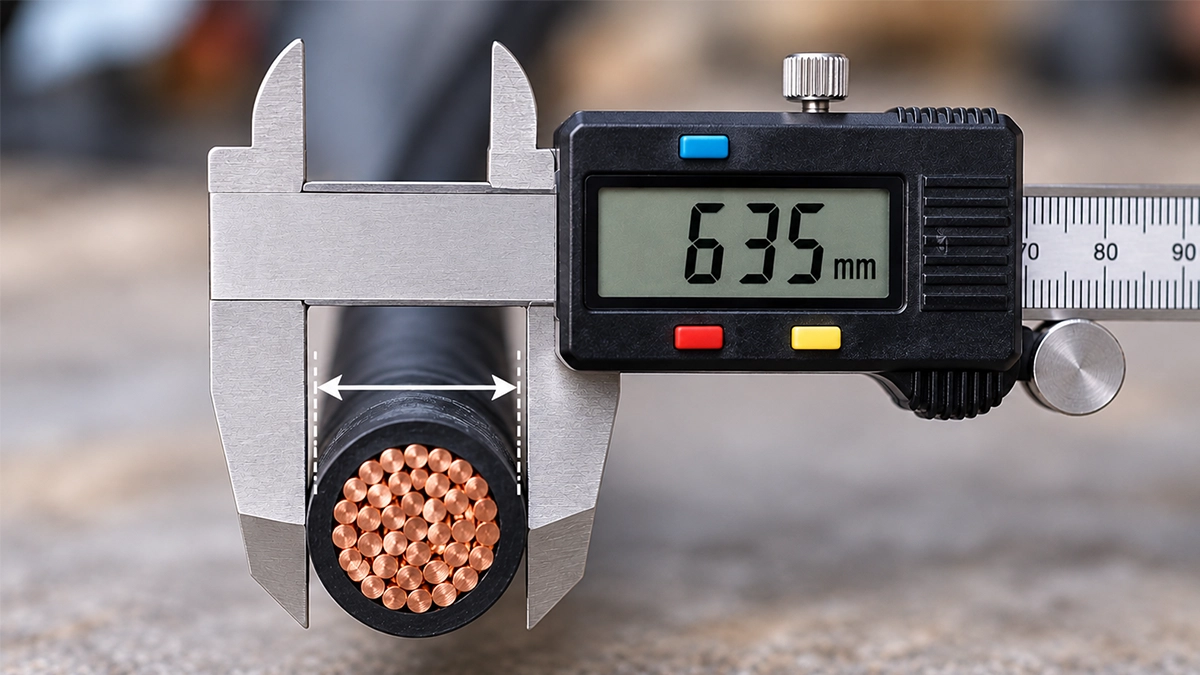
Snug, not clamped. Cable jacket is soft, and squeezing hard gives you a number smaller than reality.
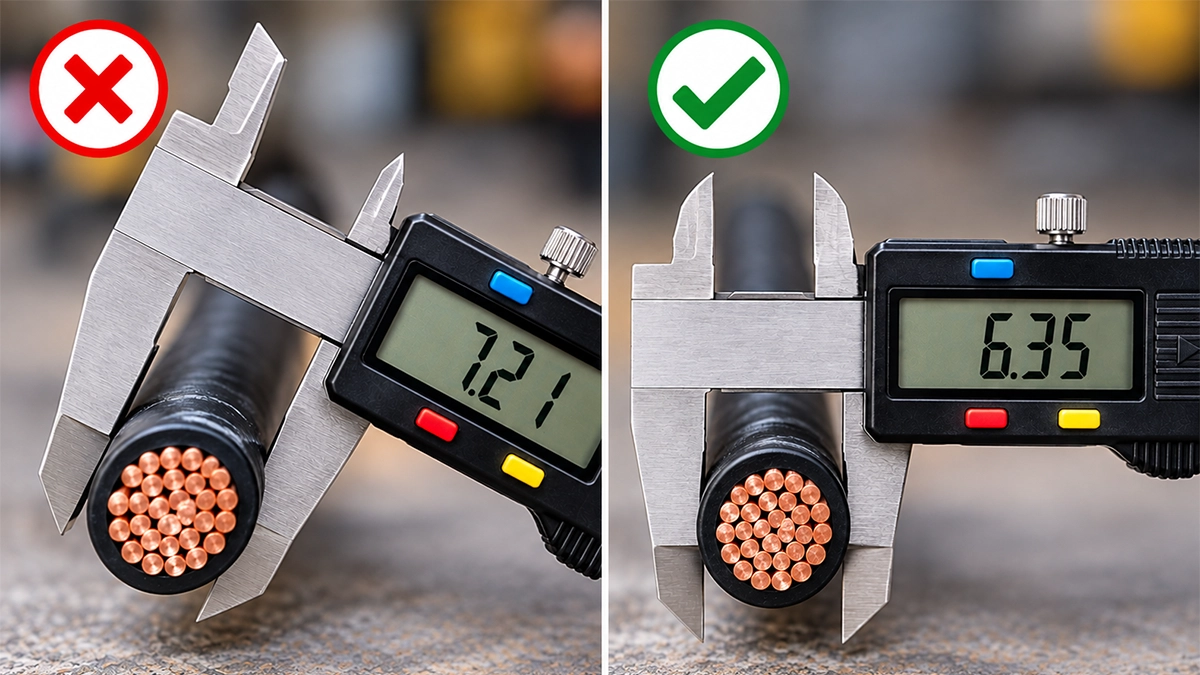
At an angle you are measuring a diagonal, which reads too large. Keep the jaws square to the cable.
Holding a ruler against the cable is the least accurate option, but there are times it is enough.
Good enough when the cable is larger than about 1/2 inch, and you are choosing between sizes that are far apart.
Not good enough when the cable is small, when two tubing sizes are close together, or when the job is specification-controlled. On a 3 mm cable, being half a millimeter out is a 17% error.
Cable that has been on a drum, pulled through a tray or clamped down often comes out slightly oval. Measured one way it reads small, measured the other way it reads large, and if you only measure once, you will not know which one you got.
Take two or three measurements at different angles around the same point, then check them here.
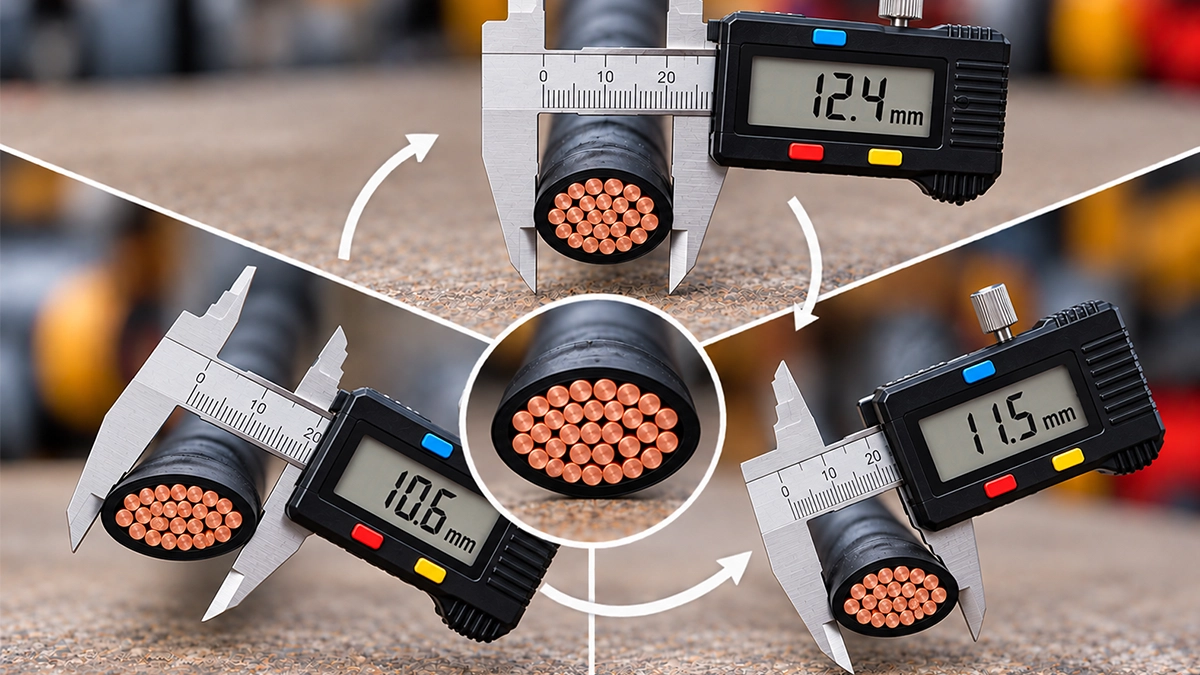
Enter your measurements. This tells you whether one number describes the cable, and which number to use if it does not.
This is the part people miss. Tubing has to slide over the widest thing in its path and then shrink down tight onto the cable. Those are two different diameters, and you need both.
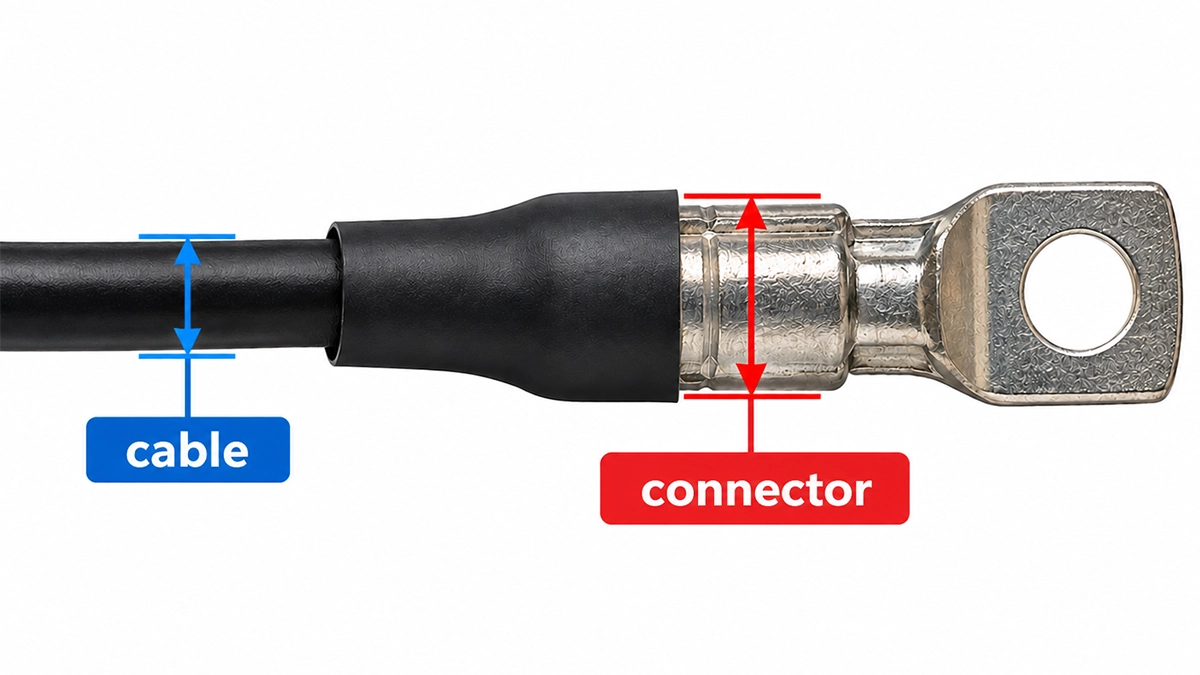
P: what it has to go over. The widest thing the tube must travel across on its way into position: a connector, a crimped terminal, a solder joint. If there is nothing in the way, there is no P. Breakouts and branches need their own approach, which Y shaped heat shrink covers.
S: what it has to grip. The cable itself, where the tubing finishes up. This is the outside diameter you measured above.
Get one without the other and the tube either will not go on, or goes on but stays loose. A tube that never gripped properly is one of the most common reasons heat shrink fails in service. For how sizing fits into the wider picture, the heat shrink tubing sizes guide covers ratios and wall types.
Put both measurements in. This checks they make sense together, then sends them straight to the Size Finder.
Once you have a cable diameter, this is the tubing size that suits it. Every row is a real product whose expanded and recovered diameters are published on its own BuyHeatShrink product page, not estimated from the nominal size.
| Cable OD | Cable OD (mm) | Tubing nominal size | Shrink ratio | Example SKU |
|---|---|---|---|---|
| 1/16 in | 1.59 mm | 3/32 in | 3:1 | HS3-0094-500FT-BK |
| 3/32 in | 2.38 mm | 1/8 in | 2:1 | HS2SR-0125-4FT |
| 1/8 in | 3.18 mm | 3/16 in | 2:1 | HSFEP/PTFE-SW-0188 |
| 5/32 in | 3.97 mm | 1/4 in | 4:1 | HSTFE4-025 |
| 3/16 in | 4.76 mm | 1/4 in | 2:1 | HS2SR-025-4FT |
| 1/4 in | 6.35 mm | 3/8 in | 3:1 | HS3AM-0375 |
| 5/16 in | 7.94 mm | 1/2 in | 3:1 | HS3A-050 |
| 3/8 in | 9.53 mm | 1/2 in | 2:1 | HS2SR-050-4FT |
| 1/2 in | 12.70 mm | 3/4 in | 3:1 | HS3A-075 |
| 5/8 in | 15.88 mm | 1 in | 3:1 | HS3A-100 |
| 3/4 in | 19.05 mm | 1 in | 2:1 | HS2C-100-4125 |
| 1 in | 25.40 mm | 1 1/2 in | 3:1 | HS3A-150 |
Each row lands between 46% and 52% of that product's shrink range, which is the middle of the recommended 20 to 80% band. These assume nothing has to slide over a connector. If something does, the tubing has to clear the connector as well, so check both the connector and the cable before ordering. Matching a competitor part number instead? The cross reference guide maps the common ones.
| Cable type | Typical OD (in) | Typical OD (mm) |
|---|---|---|
| Rows to be supplied by BuyHeatShrink. This wants figures from your own measurements or supplier data rather than anything derived from the catalog export, so it is deliberately left empty rather than filled with guesses. | ||
Strip a wire and measure the shiny bit and you will get a number far too small. Heat shrink goes over the outside, so measure over the insulation with the jacket intact.
If your number is roughly three times what you expected, you measured the circumference. Divide it by 3.1416, or use the calculator above.
The tubing has to get past the connector before it can reach the cable. People measure the cable perfectly, order the perfect size, and then find it will not slide on. When the connector cannot come off at all, slit tubing and wraparound products get round the problem.
A handful of loose wires measures bigger than the same wires dressed and tied. Lace the bundle the way it will actually sit, then measure it. There is more on dressing a bundle properly in the guide to building a better wiring harness.
Outside diameter. It is the width straight across the cable measured over everything on it, including the insulation and any jacket, not just the metal conductor inside. When a product page gives a cable size, it almost always means the outside diameter.
No. The paper strip method gets you within roughly half a millimeter on a normal cable, which is enough to pick a tubing size in most cases. Calipers are worth having if you size cable regularly, or if you work on small wire where a fraction of a millimeter matters.
That usually means the cable is slightly oval. Use the largest reading for anything the tubing has to pass over, because it has to clear the widest point, and use the average for working out how tightly it will grip. If the readings differ by more than about 10 percent, measure again, because one of them was probably taken at an angle.
Because flattening a tube does not change how much material goes around it. A tube that measures one inch across becomes about 1.57 inches wide when pressed flat, since the flat width is half the circumference. This catches people out when ordering layflat tubing and shrink bands.
Divide the circumference by 3.1416. A cable measuring 25 mm around is 7.96 mm across. If a number looks about three times larger than you expected, you measured around the cable instead of straight across it.
On a normal cable, expect to be within about half a millimeter, which is good enough to choose a tubing size in most cases. Below about 1/8 inch or 3 mm the error becomes a large share of the measurement and the method stops being reliable, so use calipers for anything that small.
Send them over and we will work out which tubing fits over your connector and still grips your cable.
Already know the size you want? Browse the full heat shrink tubing range.
Still not sure? Send us the measurements you have and what you are trying to protect, and someone will tell you what to order. There is no such thing as a silly measuring question. Getting it wrong costs far more than asking.